- Shopping, made easy.
- /
- Get the app!
General Preparation Clean tools: Scrub each straw end-to-end with the included brush and a drop of mild soap, rinse in hot water, and air-dry completely before use. Find resting larynx: Pant like a small dog, then a big dog; your resting larynx sits between those two positions. Seal and phonate: Place the straw snugly between your lips (no air leaking through mouth or nose), and phonate steady “whoops” or hum-like vowel sounds into the straw . 1. 5″ × 3 mm Straws (Higher Resistance; Short Length) When to use: Initial warm-ups to activate vocal fold closure and proprioception. Cool-downs after heavy voice use or gigs to relieve tension. Protocol: Phonate a comfortable mid-range vowel for 15 sec, rest 5 sec; repeat 3 times . Do low-to-high and high-to-low pitch glides (10–15 sec each) to explore range without strain . 2. 7″ × 3 mm Straw (Higher Resistance; Increased Back-Pressure) When to use: After warm-up, to deepen semi-occluded back-pressure for balanced vocal fold vibration. To strengthen head-voice coordination and mix voice transitions. Protocol: Phonate sustained pitches (10–15 sec) on “oo” or “ee,” focus on steady airflow and minimal throat tension . Integrate simple singing phrases or scales, keeping the straw just outside the lips, no deep insertion. 3. 7″ × 6 mm Straw (Lower Resistance; Long Length) When to use: Range extension and dynamic control—ideal for exploring higher pitches with less back-pressure. Rehabilitation or recovery when voice feels fatigued—reduces phonation threshold pressure. Protocol: Start with gentle glides at comfortable pitches (10–15 sec), noticing ease of phonation . Move to longer phrases or soft singing through the straw, ensuring a relaxed larynx and consistent airflow
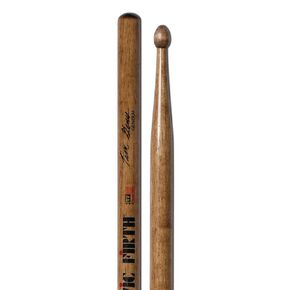 Vic Firth Tim Genis Signature Snare Stick -- General
KWD 13
Vic Firth Tim Genis Signature Snare Stick -- General
KWD 13
 Drum Heads, 2PCS Sheepskin Bongo Drum Accessory for African Bongo Drum (12.2in)
KWD 6
Drum Heads, 2PCS Sheepskin Bongo Drum Accessory for African Bongo Drum (12.2in)
KWD 6
 Snare Drum Screws 10Pcs, Drum Repair Tool Percussion Replacement Accessory Kit Screws
KWD 5.500
Snare Drum Screws 10Pcs, Drum Repair Tool Percussion Replacement Accessory Kit Screws
KWD 5.500
 Wood Drum Stand, 14in Detachable Drum Pad Stand, Tongue Drum Tripod Tank Drum Display Rack, Portable Handpan Stand with 4 Soundproofing Pads, For Playing on the Go and for Daily Practice
KWD 7
Wood Drum Stand, 14in Detachable Drum Pad Stand, Tongue Drum Tripod Tank Drum Display Rack, Portable Handpan Stand with 4 Soundproofing Pads, For Playing on the Go and for Daily Practice
KWD 7


