- Shopping, made easy.
- /
- Get the app!
Package Include:
1 X AC Condenser
Specifications:
High Performance Racing Spec.
Condition: Brand New
Core Dimensions: 34 5/8" x 18 7/16" x 5/8"
Replaces part numbers: A2272869000
Description:
The air-conditioning condenser is located between the car's grille and the engine-cooling radiator in which the gaseous refrigerant sheds heat and returns to a liquid state. The liquid refrigerant flows to the evaporator inside the dashboard, where it cools the cabin.
The condenser works as a car radiator by dissipating out heat but also cooling the high-pressure refrigerant gas, so it forms into a high-pressure liquid, then gets streamed to the receiver-dryer until it continues to the expansion valve.
If you feel not cool enough, it might result from a clogged air-conditioning condenser or disabled cooling fan. A leak in the condenser will also result in a loss of refrigerant.
How to Replace A/C Condenser:
Step 1: Discharging and recovering the AC refrigerant.
Step 2: Condenser removal and replacement.
Step 3: Remove parts that are in the way of the condenser.
Step 4: Take off the A/C lines that run to the condenser.
Step 5: Take off the condenser.
Step 6: Install a new condenser.
Step 7: Install the A/C lines and replace the o-rings.
 -21%
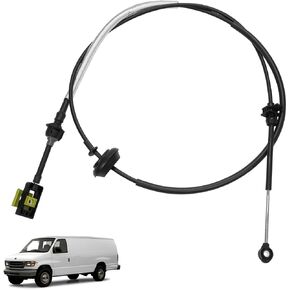
YC2Z-7E395-AC Automatic Transmission Gear Shift Cable for 1997-2004 Ford Econoline E150/E250/E350 with E40D/4R100 Trasmission
KWD 19
-21%
YC2Z-7E395-AC Automatic Transmission Gear Shift Cable for 1997-2004 Ford Econoline E150/E250/E350 with E40D/4R100 Trasmission
KWD 19
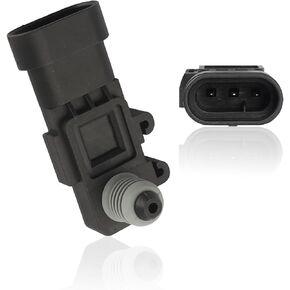 1 Pack Car Fuel Tank Pressure Sensor Accessories, Waterproof Durable Design, Compatible with Delphi Third Generation Replacement OEM #16238399 9377680 09377680 16196060 (Black)
KWD 4.500
1 Pack Car Fuel Tank Pressure Sensor Accessories, Waterproof Durable Design, Compatible with Delphi Third Generation Replacement OEM #16238399 9377680 09377680 16196060 (Black)
KWD 4.500
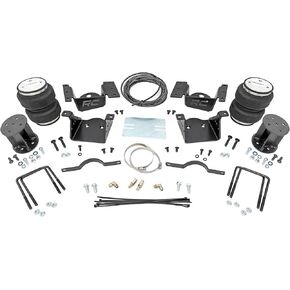 Rough Country Air Spring Kit for 7.5 Lifted 11-19 Chevy/GMC 2500/3500HD - 100074
KWD 132
Rough Country Air Spring Kit for 7.5 Lifted 11-19 Chevy/GMC 2500/3500HD - 100074
KWD 132
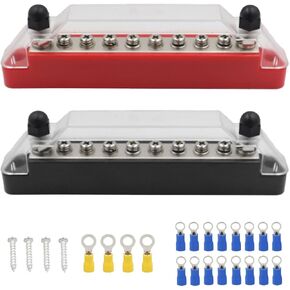 Power Distribution Terminal Block, 150A Battery Bus Bar with Cover, M6 Terminal Studs, M4 Terminal Screws, Negative/Positive Bus Bar Set for Car Boat Marine
KWD 5.500
Power Distribution Terminal Block, 150A Battery Bus Bar with Cover, M6 Terminal Studs, M4 Terminal Screws, Negative/Positive Bus Bar Set for Car Boat Marine
KWD 5.500


