All electronics ship with US style plugs.You may need a voltage converter or a plug adapter.
Special Features
Product Information: This product measures 1.76 inches in length and is a replacement for DE61-00048A. Upon purchase, you will receive 4 DE61-00048A springs
Product Function: The DE61-00048A key spring facilitates the operation of the oven control knob. This component is critical for precise oven performance, ensuring temperature settings are maintained. Difficulty adjusting oven settings may indicate a worn or damaged key spring
Compatibility: Compatible with the following models: SMH9187ST/XAA, SMH9187W/XAA, SMH9187B/XAA, ME21F606MJT/AA-01, SMH9207ST/XAA-00, SMH9207ST/XAA-01, ME21F606MJT/AA-00, SMH2117S/XAA-01, SMH2117S/XAA-02, ME16K3000AS/AA-00, ME17H703SHW/AA-01, ME16K3000AW/AA-00, ME16K3000AB/AA-00, ME17H703SHS/AA-01, ME17H703SHS/AA-00, ME17H703SHB/AA-00, ME17H703SHW/AA-00, SMH1611B/XAA-00, SMH7187STG/XAA-00, SMH7185STG/XAA.
ME16H702SEB/AA-01, ME16H702SES/AA-01, SMH8165ST/XAA-01, SMH8165STE/XAA-01, SMH8165ST/XAA-00, SMH1611W/XAA-00, SMH8165STE/XAA-00, ME16H702SEB/AA-00, ME16H702SEW/AA-00, SMH1713S/XAA-01, SMH1713W/XAA-01, SMH1713B/XAA-01, SMH1622B/XAA-01, SMH1622S/XAA-01, SMH1622W/XAA-01, SMH9151ST/XAA-00, SMH9151STE/XA-00, SMH9151B/XA-00, SMH9151WE/XA-00, SMH9151W/XA-00, and other models. Verify compatibility before purchase
Premium Materials: The DE61-70136A key spring is crafted from high-quality metal designed to withstand frequent use in kitchen environments. Its durable construction ensures the spring maintains its shape and functionality over time, delivering reliable performance
When to Replace: Symptoms indicating the key spring needs replacement include difficulty turning the oven knob, the knob staying in the turned position, or inconsistent temperature readings. If you notice your oven controls are less responsive than before, replacing the DE61-00048A key spring can resolve these issues
Easy Installation: To replace the DE61-70136A microwave door latch spring, first disconnect power and discharge static electricity. Prepare tools and verify part compatibility. Remove the microwave door, disassemble internal components to extract the old spring, then install the new spring in its original position. Reassemble the door in reverse order and reattach it to the unit. Finally, conduct manual and powered tests to ensure smooth door closure and proper appliance operation. Handle all components gently and prioritize safety throughout the process. Contact a professional if difficulties arise
After-Sales Service: Should you encounter any questions or difficulties while using the product, please do not hesitate to contact us anytime via online customer service, email, or phone. Our professional team is dedicated to serving you with prompt responses


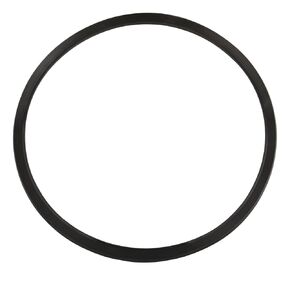 S-9882 Pressure Cooker Gasket for Mirro Pressure Cookers 12 qt/16 qt/22 qt, Replaceable Pressure Cooker Rubber Ring Models M-0512 M-0522 M-0312 M-0406 M-0416 M-0526 M-0622, 1 Pack
KWD 4
S-9882 Pressure Cooker Gasket for Mirro Pressure Cookers 12 qt/16 qt/22 qt, Replaceable Pressure Cooker Rubber Ring Models M-0512 M-0522 M-0312 M-0406 M-0416 M-0526 M-0622, 1 Pack
KWD 4
 6930W1A003J Microwave Thermostat Fits for LG Appliances Compatible with P4441844 6930W1A003C, 1365195, 6930W1A002D, 6930WRT003C, PS3530463
KWD 4.500
6930W1A003J Microwave Thermostat Fits for LG Appliances Compatible with P4441844 6930W1A003C, 1365195, 6930W1A002D, 6930WRT003C, PS3530463
KWD 4.500
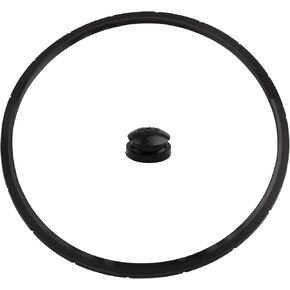 09985 Sealing Ring Suitable for Presto Pressure Cooker (16 qt/18 qt/23 qt), Pressure Cooker Rubber Ring Replaceable Model 01745 01751 01755 01781 01782 01784, Pressure Cooker Parts,1 pack
KWD 4.500
09985 Sealing Ring Suitable for Presto Pressure Cooker (16 qt/18 qt/23 qt), Pressure Cooker Rubber Ring Replaceable Model 01745 01751 01755 01781 01782 01784, Pressure Cooker Parts,1 pack
KWD 4.500
 SP 9669 Extension Spring, Small Spring, Single Loop Opening, 4-Inch Length, 9/16-Inch Outside Diameter, Spring Steel Construction, 4-Pack
KWD 4.500
SP 9669 Extension Spring, Small Spring, Single Loop Opening, 4-Inch Length, 9/16-Inch Outside Diameter, Spring Steel Construction, 4-Pack
KWD 4.500


