- Shopping, made easy.
- /
- Get the app!
1. turn off the power switch on the lower left side of the control box
2. Remove the cotter pin at the end of the door arm.
3. Open the clamshell shell for about one inch and unplug the pin connector cable.
4. Fix the board on the assembly with a shorter T20 screw, screw on the board, and then reinsert the connector to ensure that the orange and green cables match the marks on the circuit board.
5. After removing all accumulated garbage, it is better to put some wires or small nails into the drain hole at the bottom to ensure that the water can be drained, and then turn on the power again. (No instructions attached)
 DE47-20034A 1601 KSD-150LC Thermostat Thermal Fuse Bimetal Compatible with LG/Compatible with GE/Compatible with Samsung Microwave
KWD 6.500
DE47-20034A 1601 KSD-150LC Thermostat Thermal Fuse Bimetal Compatible with LG/Compatible with GE/Compatible with Samsung Microwave
KWD 6.500
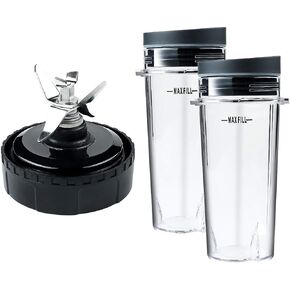 2 Pack 6 Fins Blender Blade Assembly and Single Serve 16 oz Cups Replacement Parts Compatible with Nutri Ninja BL770 BL771 BL772 BL740 BL780 BL660 BL663 Professional Smoothie Blender (3.35 inch)
KWD 12
2 Pack 6 Fins Blender Blade Assembly and Single Serve 16 oz Cups Replacement Parts Compatible with Nutri Ninja BL770 BL771 BL772 BL740 BL780 BL660 BL663 Professional Smoothie Blender (3.35 inch)
KWD 12
![Rebower KSD301 Thermostat 95C NO Temperature Thermal Control Switch, [for Microwave Oven Refrigerators] - Normally Open/90C Angle/5pcs in Kuwait](https://cdn1.tilga.com/md/prod/1/910/3/30933937.59894.jpg) Rebower KSD301 Thermostat 95C NO Temperature Thermal Control Switch, [for Microwave Oven Refrigerators] - Normally Open/90C Angle/5pcs
KWD 4
Rebower KSD301 Thermostat 95C NO Temperature Thermal Control Switch, [for Microwave Oven Refrigerators] - Normally Open/90C Angle/5pcs
KWD 4
 OSKOUR 30 Pieces Furniture Dust Covers with Elastic Band Dustproof Kitchen Appliance Covers for Oven Pressure Cooker Crock Pot Air Fryer Small Appliance Covers
KWD 4
OSKOUR 30 Pieces Furniture Dust Covers with Elastic Band Dustproof Kitchen Appliance Covers for Oven Pressure Cooker Crock Pot Air Fryer Small Appliance Covers
KWD 4


