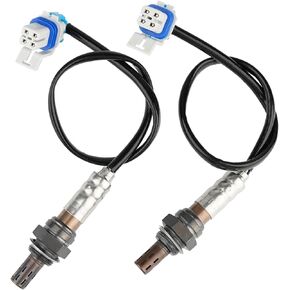
✅ FITMENT: Liangchi Air Fuel Ratio Sensor For 3.5L V6 engine ONLY. For Honda Odyssey 2011-2013, For Honda Accord 2008-2012 ,For Honda Pilot 2009-2011 ,For Honda Ridgeline 2009-2011 ,For Acura TSX 2010-2014, For Acura TL 2009-2011。
✅ Replace OE Number: Liangchi sensor de oxígeno Replace part number 36531-R70-A01, 36532-R70-A01 234-4461 2344461, 234-5098, 2345098.⚠NOTE: Please check the part numbers whether they suit your vehicle before purchasing
✅ About Sensor: Durability is important, that's why the Liangchi O2 sensor is made from high-temperature-resistant materials with a built-in heater to speed up the ignition, improve fuel efficiency, reduce harmful emissions, and prevent vibration and wire corrosion for a longer lifespan!
✅ About Selection: Please check the oxygen sensor plug before purchasing or use the year/brand/model and interchangeable part numbers to confirm compatibility, ⚠NOTE: Professional installation is highly recommended,
✅ About Installation: Step 1. Locate the oxygen sensor position and remove it with a socket, step 2. Compare the new sensor to the old sensor to ensure a proper installation, step3. Please clean the threaded port to ensure a proper seal of the new sensor, step 4. Gently tighten the sensor to keep the wire free from damage and avoid sensor leakage,


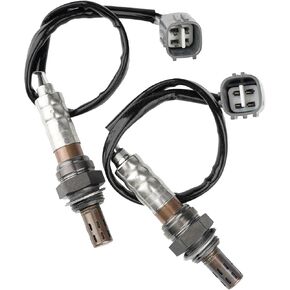
 O2 Sensor Downstream 213-4229 Fit for Chevrolet Silverado Suburban Tahoe Impala Avalanche Corvette Caprice Cadillac GMC Hummer Pontiac Saturn
KWD 12.500
O2 Sensor Downstream 213-4229 Fit for Chevrolet Silverado Suburban Tahoe Impala Avalanche Corvette Caprice Cadillac GMC Hummer Pontiac Saturn
KWD 12.500
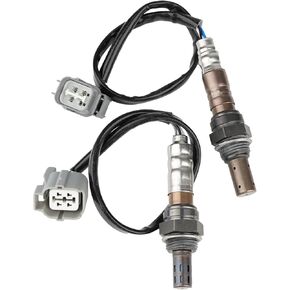 Oxygen Sensor 234-9005 234-4125 Upstream & Downstream O2 Sensor Fit for Honda CR-V EX LX 2.4L 2002-2004
KWD 20.500
Oxygen Sensor 234-9005 234-4125 Upstream & Downstream O2 Sensor Fit for Honda CR-V EX LX 2.4L 2002-2004
KWD 20.500
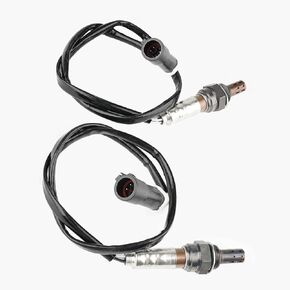 Oxygen Sensor 15717 O2 Sensor Downstream Upstream for Ford F150 F250 Jaguar Lincoln Mercury
KWD 12.500
Oxygen Sensor 15717 O2 Sensor Downstream Upstream for Ford F150 F250 Jaguar Lincoln Mercury
KWD 12.500
 Oxygen Sensor 234-4260 Downstream O2 Sensor for Lexus ES300 ES330 ES350 GX460 GX470 LX470 LX570, Toyota 4Runner Avalon Camry FJ Cruiser Land Cruiser RAV4 Sequoia Solara Tacoma Tundra Venza
KWD 14
Oxygen Sensor 234-4260 Downstream O2 Sensor for Lexus ES300 ES330 ES350 GX460 GX470 LX470 LX570, Toyota 4Runner Avalon Camry FJ Cruiser Land Cruiser RAV4 Sequoia Solara Tacoma Tundra Venza
KWD 14


