Warranty & Support: One-Year Quality Guarantee. If you encounter any product issues within the warranty period, please contact us for prompt and efficient support.
Important:Please make sure that the parts, connectors and plugs on our pictures are the same as your old products before ordering, to avoid wrong purchase
Product Features: Reliable and stable performance. Built for durability and long-lasting use. 100% tested before shipment. High-quality materials, meeting or exceeding OEM standards. Precision-engineered for easy, tool-free installation. Secure, box packaging.
Performance Benefits: Enhances vehicle performance and resolves diagnostic trouble codes. Direct replacement, no calibration or programming required.
Installation Guide: 1. Use a diagnostic tool to identify the fault code and defective component. 2. Disconnect the wiring harness from the old part. 3. Install the new replacement part. 4. Clear the fault codes.


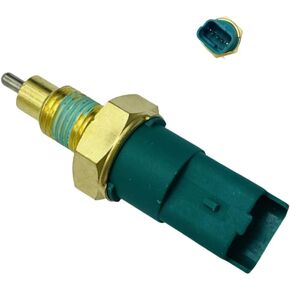 Brake Stop Light Switch Fit for Nissan Sentra Versa 2007-2018,Cube 2009-2014,Micra 2015-2018,Juke 2011 2012 2013 2014 2015 2016 2017,3200500QAE SW9737 8200177718
KWD 5
Brake Stop Light Switch Fit for Nissan Sentra Versa 2007-2018,Cube 2009-2014,Micra 2015-2018,Juke 2011 2012 2013 2014 2015 2016 2017,3200500QAE SW9737 8200177718
KWD 5
 PCV Valve V392 PCV390 6P1259 045-0360 1F7213890 4L5Z6A666AA Fit for Ford Mazda Mercury,Ranger Escape 6 Mariner B4000 2004 2005 2006 2007 2008 3.0L,F-150 2015-2019 3.5L
KWD 5.500
PCV Valve V392 PCV390 6P1259 045-0360 1F7213890 4L5Z6A666AA Fit for Ford Mazda Mercury,Ranger Escape 6 Mariner B4000 2004 2005 2006 2007 2008 3.0L,F-150 2015-2019 3.5L
KWD 5.500
 PCV Valve 045-0434 12204-36020 Fit for TOYOTA AVALON CAMRY RAV4 2010-2020 2.5L,HIGHLANDER 2010-2019 2.7L,VENZA 2009 2010 2011 2012 2013 2014 2015 2016 2.7L
KWD 7
PCV Valve 045-0434 12204-36020 Fit for TOYOTA AVALON CAMRY RAV4 2010-2020 2.5L,HIGHLANDER 2010-2019 2.7L,VENZA 2009 2010 2011 2012 2013 2014 2015 2016 2.7L
KWD 7
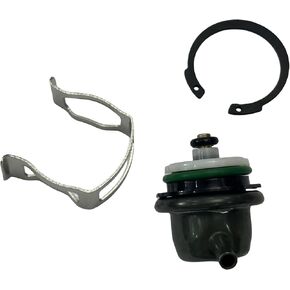 12574986 12555909 89060420 8171136780 8890604200 17113517 17113536 17113555 17113678 19245530 PR203 PR155 PR121 Fuel Injection Pressure Regulator Compatible with Buick GMC Chevrolet
KWD 7
12574986 12555909 89060420 8171136780 8890604200 17113517 17113536 17113555 17113678 19245530 PR203 PR155 PR121 Fuel Injection Pressure Regulator Compatible with Buick GMC Chevrolet
KWD 7


