Precisely Fit to Exhaust Pipe: Made of durable Graphite for long service time, with great corrosion resistance and heat-insulation, reinforced sealing gasket maintains leak-proof performance, even during mountain driving or heavy-load operations.
Practical Sealing Performance: Exhaust Donut Gasket Muffler Ring prevents exhaust leakage, eliminates the transmission's noise and vibration, creates an airtight barrier between manifolds and pipes, delivers silent cabin comfort for car owners.
Easy Installation: 1.Find the location of the exhaust pipe interface pad; 2.Use tools to remove screws and springs; 3.Use pliers to clamp the interface pad and pull it off; 4.Clean the location of the interface pad; 5. Press the new interface pad into place to ensure it is firmly installed.


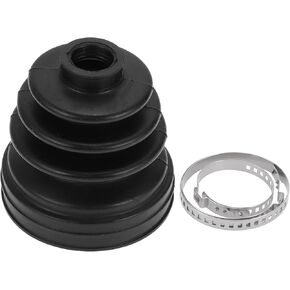 Inner CV Joint Boot Kit for Mazda 3 2004-2006 2010-2013 for Mazda CX-5 2013-2016 Constant Velocity Joint Boot No.GG2722540 W/Clamps 1 Set
KWD 7
Inner CV Joint Boot Kit for Mazda 3 2004-2006 2010-2013 for Mazda CX-5 2013-2016 Constant Velocity Joint Boot No.GG2722540 W/Clamps 1 Set
KWD 7
 2 Pcs Electrical Harness Connector for GM Trucks for Cadillac Escalade for Chevrolet Malibu Avalanche Silverado Electric Fan Pigtail Connector 13580874 88987983 Car Parts
KWD 4
2 Pcs Electrical Harness Connector for GM Trucks for Cadillac Escalade for Chevrolet Malibu Avalanche Silverado Electric Fan Pigtail Connector 13580874 88987983 Car Parts
KWD 4
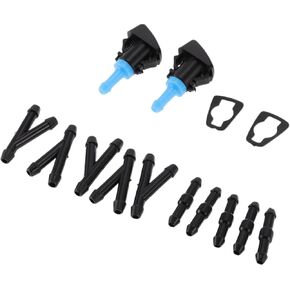 Windshield Washer Nozzle for Jeep Patriot 2008-2017 Front W/ 5 Pcs Y Hose Connector Car 05303834AB Black,Blue Plastic 1 Set
KWD 2.500
Windshield Washer Nozzle for Jeep Patriot 2008-2017 Front W/ 5 Pcs Y Hose Connector Car 05303834AB Black,Blue Plastic 1 Set
KWD 2.500
 2pcs 5.7 Inch Rear Suspension Bump Stop Strut Bumper Bump Stop for Volkswagen Jetta 2002-2005 1J0512131 Rubber Orange Replacement Car Parts
KWD 5
2pcs 5.7 Inch Rear Suspension Bump Stop Strut Bumper Bump Stop for Volkswagen Jetta 2002-2005 1J0512131 Rubber Orange Replacement Car Parts
KWD 5


