- Shopping, made easy.
- /
- Get the app!
Removal of Bushing:
1.Scribe the bushing orientation on the beam tube and compression tube.
2.The spring pins are not required to line up with the bushing holes during removal.
3.Tighten retaining nuts to remove slack. Thread on hammer adapter in the event the bushing becomes seized. Hook up hydraulics and begin removal operation.
4.After each 2 inch stroke, re-tighten nuts to take up slack. (Most bushing will require 3-4 adjustments)
Installation of Bushing:
1.Lubricate the bushing and insert the bushing into compression cylinder.
2.Place the plunger on top of the bushing, align the mark on the bushing with the mark on the plunger. The 4 corresponding pins to the bushing type you are installing should seat into the bushing.
3.Tighten retaining nuts to remove slack. Thread on hammer adapter in the event the bushing becomes seized. Confirm the plunger is aligned with the scribed mark on the beam tube and the pins are still engaged in the bushing.Hook up hydraulics and begin installation operation.
4.After each 2 inch stroke, retighten nuts to take up slack. (Most bushing will require 3-4 adjustments).Ensure that threads on tool are well lubricated before and during use to avoid damaging threads.
 SleYuYir 60C 140F Thermostat Compatible with Outboard DF200 DF225 DF250 DF300 DF70 DF80 DF90 Replace 17670-90J00 67F-12411-01-00 5033721
KWD 6.500
SleYuYir 60C 140F Thermostat Compatible with Outboard DF200 DF225 DF250 DF300 DF70 DF80 DF90 Replace 17670-90J00 67F-12411-01-00 5033721
KWD 6.500
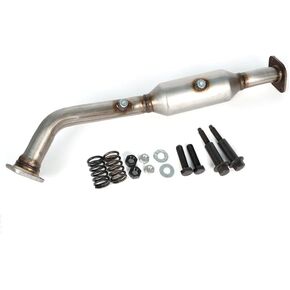 Compatible with INFINITI G37 3.7L Catalytic Converters 2008-2013 Both sides 12H5485/84 52284 52285
KWD 26.500
Compatible with INFINITI G37 3.7L Catalytic Converters 2008-2013 Both sides 12H5485/84 52284 52285
KWD 26.500
 Automatic Transmission Shift Cable 68164081AB 68164081AC Compatible with Dodge Dart 2013 2014 2015 2016 Auto Gearshift Control Range Selector Lever Cable
KWD 37
Automatic Transmission Shift Cable 68164081AB 68164081AC Compatible with Dodge Dart 2013 2014 2015 2016 Auto Gearshift Control Range Selector Lever Cable
KWD 37
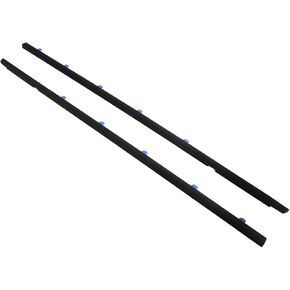 4Pcs Weatherstrip,Window Moulding Trim Seal Belt Compatible with Honda Accord 2003-2007,Replace# 72950-SDA-A01 72910-SDA-A01 72910-SDA-A01 72950-SDA-A01
KWD 14.500
4Pcs Weatherstrip,Window Moulding Trim Seal Belt Compatible with Honda Accord 2003-2007,Replace# 72950-SDA-A01 72910-SDA-A01 72910-SDA-A01 72950-SDA-A01
KWD 14.500


