- Shopping, made easy.
- /
- Get the app!
Pixel 6 Pro Fingerprint Sensor Installation Guide for Screen Replacement
Professional Guide for Fingerprint Function Migration
🌟 Core Installation Notice
This OLED screen supports fingerprint recognition but does NOT include a fingerprint sensor or cable. Reuse the original fingerprint cable from the old screen to enable unlocking—non-OEM cables may cause system errors (e.g., "Fingerprint sensor not detected"), recognition failures, or compatibility issues.
Warning: Discarding the original cable voids recommended practices and may lead to permanent functionality loss.
📝 Pre-Installation Steps (CRITICAL)
2 Critical Actions Before Removing Old Screen:
Access Settings → Biometrics → Fingerprint on your device (or Google's official site) to calibrate the old screen's fingerprint function, ensuring the cable can register and recognize prints.
Test unlocking 10+ times after calibration. Proceed with disassembly only if functionality is verified—faulty cables will cause irreversible issues when migrated.
🧰 Tools & Materials Required
Original fingerprint cable (pre-calibrated and functional)
New OLED screen (this product)
Spare flex cable (recommended for backup)
Tools: Fine tweezers, 60-70℃ heat gun, 45° plastic pry tool, 0.1mm thermal adhesive, positioning stickers, anti-static gloves/mat
🔧 Step-by-Step Installation Process
⚠️ Safety Protocol: Power off → remove battery (if detachable) → use anti-static gear on an insulated work surface.
1. Removing Original Cable (High-Risk Step)
a. Flex Cable Disconnection
Locate the white/black flex cable connector on the motherboard (with latch).
✅ Use tweezers to release the latch, pull the cable VERTICALLY—DO NOT twist (0.5mm width, Very fragile).
b. Adhesive Removal
If cable is glued to the old screen: heat module perimeter with heat gun (≥10cm distance, ≤70℃), then pry at 45° with a plastic tool.
2. Installing on New Screen
a. Precision Positioning
Use positioning stickers to mark the cable location (reference old screen photos for alignment).
Apply 0.1mm thermal adhesive to the cable back for enhanced ultrasonic conductivity.
b. Cable Connection
Insert the cable into the motherboard port until it clicks; secure with insulating tape to prevent bending.
Route the cable per OEM specifications, fixing it in the slot to avoid friction with components.
c. Screen Bonding
Avoid pressing over the fingerprint module area; use support blocks for even pressure during installation.
Keep adhesive 5mm away from the module to prevent ultrasonic interference.
 INCELL for Oneplus Nord N20 5G Screen Replacement for Display Oneplus Nord N20 LCD GN2200 CPH2459 LCD Digitizer Screen Touch Assembly Repair Part
KWD 14.500
INCELL for Oneplus Nord N20 5G Screen Replacement for Display Oneplus Nord N20 LCD GN2200 CPH2459 LCD Digitizer Screen Touch Assembly Repair Part
KWD 14.500
 OLED for Google Pixel 7 Pro 5G LCD Screen Replacement for Google Pixel 7 Pro LCD Display GP4BC GE2AE LCD Digitizer Screen Touch Assembly Repair Kits Black with Frame(No Fingerprint Cable
KWD 53
OLED for Google Pixel 7 Pro 5G LCD Screen Replacement for Google Pixel 7 Pro LCD Display GP4BC GE2AE LCD Digitizer Screen Touch Assembly Repair Kits Black with Frame(No Fingerprint Cable
KWD 53
 OLED for Samsung Galaxy S22 Ultra 5G Screen Replacement for Samsung S22 Ultra LCD Display SM-S908B SM-S908U LCD Digitizer Touch Screen Assembly Green with Frame(US Version,Support Fingerprint)
KWD 62.500
OLED for Samsung Galaxy S22 Ultra 5G Screen Replacement for Samsung S22 Ultra LCD Display SM-S908B SM-S908U LCD Digitizer Touch Screen Assembly Green with Frame(US Version,Support Fingerprint)
KWD 62.500
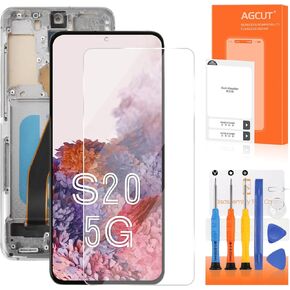 INCELL for Samsung Galaxy S20 5G Screen Replacement S20 5G LCD Display SM-G981 SM-G981F SM-G981U LCD Digitizer Screen Touch Grey with Frame(No Fingerprint Function)(Not for 4G)
KWD 29.500
INCELL for Samsung Galaxy S20 5G Screen Replacement S20 5G LCD Display SM-G981 SM-G981F SM-G981U LCD Digitizer Screen Touch Grey with Frame(No Fingerprint Function)(Not for 4G)
KWD 29.500


